Tag Archives: cake

Halloween Party!

4 Nov

A few weeks back, we were at my parents’ house.  It was a party they were having for the annual Air Show at our local Marine Corps Base – their backyard is right in the flight path and it’s always a spectacular show, with planes screaming over just a few hundred feet overhead – you can even read the pilots’ names at times, if you’re quick enough.  Anyway, the point is that my parents invited my best friend and his wife to come along to the party, and we were sitting at the table with them.  We happened to ask them what they were up to for Halloween.  Nothing, they said, so we suggested they come over to our place.

We always have tons of trick-or-treaters, so even though Halloween is my least-favorite holiday (something to do with scary masks the year I was three, I think), we thought it would be a fun way to spend the evening.  Later in the month, we happened to be hanging out with two other couples and mention the idea of coming over to them too.  Suddenly we had a party on our hands!

First, decorations.  We’ve only got 2 boxes for Halloween (as opposed to about a dozen big Rubbermaid tubs for our Christmas stuff), but we were able to do a little bit of decorating.

I love these guys... I bought them about 5 years ago at Big Lots, and haven't seen any scarecrows cuter since!

Above the television sat my two gorgeous pumpkins, a bunch of our photos (including this one from our first anniversary, courtesy of Melissa McClure Photography!) and these little cuties, picked up for us two years ago by my grandmother.

I spent a lot of the morning cooking, including spinach artichoke dip.  A couple of years ago I posted a recipe for this, but I tried to make this a little more standard:

Elisa’s Spinach Artichoke Dip

  • 1 bag (16 oz) frozen chopped spinach, thawed
  • 1 bag (12 oz) frozen artichoke hearts, thawed and chopped (they have these at Trader Joe’s)
  • 1/4 cup mayonnaise
  • 1/3 cup shredded mozzarella cheese
  • 1/3 cup shredded parmesan cheese
  • 1/2 tsp salt
  • 1/2 tsp black pepper
  • 1/4 tsp granulated garlic or 1 medium garlic clove, chopped fine
  • additional mozzarella for sprinkling over the top of the dip

Mix all the ingredients except the additional mozzarella in a bowl.  Smooth into a greased baking dish and cover with additional cheese.  Bake at 375 degrees until cheese is melty and browned.  Notice that I didn’t say what size a dish to use – that’s because you can really use anything it’ll fit into.  It depends on whether you want a lot of brown bubbly cheese on top (use a wide dish) or just a little (use a deep one).  This will feed 4-8 people, depending on whether you use it as an appetizer or a side dish.  Serve it with toasted baguette or tortilla chips.

Waiting to be uncovered and eaten... Spinach artichoke dip with chips!

I also made these babies, gorgeous fluffy cupcakes from one of my favorite blogs, Patent and the Pantry

Pretty and tasty!

I did make a couple of adjustments to the recipe, specifically the spices.  I used 2 tsp cinnamon, 1/2 tsp nutmeg, 1/2 tsp pumpkin pie spice (mostly because I actually don’t have ground allspice, plus I actually like the mixture), and a pinch of ground cloves.  I’m not a big fan of ginger in pumpkin dishes – I’m not sure why, I just have never really liked it.  Anyway, these were originally a Martha Stewart recipe, and sometimes her stuff is a little too fussy for me but these were quite easy and really delivered on flavor.  With the cream cheese frosting (at the same link), they were perfect.  Honestly.  My sister commented that they tasted like pumpkin cheesecake.  Which gave me an idea…  I haven’t tried it out yet, but I’m pretty excited.  Let’s just say that if my idea ends up being good I’ll post it next week.  Anyway, I digress.

Our dinner was a pizza bar.  I didn’t get any good photos, unfortunately, but I made a TRIPLE batch of my basic bread dough recipe.  I mixed up the dough Saturday afternoon and let it proof in the fridge overnight in two huge bowls, and then Sunday morning I took it out and let it warm up to room temperature and get all beautiful and puffy.  I divided it into roughly the same size pieces and rolled them into 1 1/2″ balls and pulled them into odd-shaped thin crusts by hand and poked them with a fork so they wouldn’t rise too much in the oven.  I made five or six dozen of them, dusting the bottoms with corn meal and baking them in batches, 5 minutes at a time.

The beginning of our pizza bar, with plates and sauces. The pizza crusts are in the big basket at the back!

The rest of the pizza bar was made of various sauces, meats, vegetables, and cheeses, laid out and labeled (you can see the cute little labels I made in the photo below).  On the menu:

  • tomato sauce (bottled – the best one I’ve found is by Barilla)
  • BBQ sauce (our favorite is Sweet Baby Ray’s – it’s very sweet but full of great flavor)
  • Trader Joe’s curry sauce
  • garlic oil
  • homemade pesto (no real recipe for this one – I just blend up some basil leaves, garlic, lemon juice, and olive oil in my food processor)
  • roasted garlic
  • carmelized onions (cut and mixed with a little butter and salt, and placed in the crock pot on low overnight)
  • roasted eggplant from the garden
  • roasted zucchini
  • roasted sweet peppers
  • garlic mushrooms (sauteed with a little butter)
  • artichoke hearts
  • spinach
  • olives
  • cut basil leaves
  • figs
  • cooked chicken
  • Trader Joe’s sweet Italian chicken sausage
  • Trader Joe’s pepperoni
  • garlic shrimp
  • mozzarella cheese
  • parmesan cheese
  • cheddar cheese

I know it's a poor photo, and this was before I dished out the meats. But you can see our toppings and the labels I made!

I had planned on using goat cheese too, my Mexican hot sauce, and fresh tomatoes.  But I didn’t realize the goat cheese had been opened the week before (and it was no good, sadly) and forgot the tomatoes and hot sauce completely.  Even so, one of our guests said there were just too many choices!  I say there are never too many…  Especially during a party like this, it’s totally worth giving people lots of options.  Each person grabbed one (or two, or three!) pizza crust and decorated it with exactly the toppings he or she wanted.  My favorite was roasted vegetable; my husband loved the BBQ sauce with chicken sausage and figs (no one ever said he was conventional!)

Of course I got to wear my Wonder Woman costume again, this time with a modification to the belt.  It still sort of flopped down, but at least it wasn’t unsticking all the time.  You can also see the “golden lasso” I got at WalMart for $1.75 (that Iaccidentally left at home on Friday).

I love this costume!

I also made my hubby’s costume – he was Clark Kent, wearing a blue shirt underneath his button-up that I applied an iron-on Superman logo to.  Since he used mostly clothes he already had, this was an $8 costume, thanks to Old Navy.

We had an awesome time with our friends, even though L&J couldn’t make it.  We had over 200 kids come to the door, gave out lots of pencils and plastic spider rings (what can I say?  we learned how expensive candy can be at our house on Halloween, plus it’s kind of fun to be different), and watched Halloween cartoons (including my very favorite “Disney’s Trick or Treat”, with Donald and his three nephews and Witch Hazel!  Thank you ABC Family for showing it this year!).  By the end of the night we were totally exhausted, but it was such a fun time that hubby suggested this might be an annual event.  We’ll see…  More than 6 people in our teeny living room would be a bit of a stretch, but maybe by next year we’ll have a new place?

Anyway, since we had costumes, we suggested our friends dress up too, and we took this on my camera’s timed setting:

Happy Halloween!

Fig and Honey Cakes

30 Sep

The weather today is strange…  It’s alternately pouring rain and thundering incredibly loudly.  Every hour or so the sun will peek out from behind the clouds.  To tell you the truth, I kind of love it! 

I had a ton of plans that got cancelled because of the weather; I really should have been cleaning the house, but I got a brand new box from our CSA and it had figs in it!  FIGS!

I love figs.  I really really love figs.  I actually didn’t try them until I was in my late twenties, and I mostly eat them either by themselves or in savory dishes, like my goat cheese pizza.  But the weather is just perfect for baking.  So instead of doing dishes or laundry (sorry honey!) I mixed up some beautiful fig and honey olive oil cakes.

This was another one of my “throw a bunch of stuff into a bowl and go for it” recipes – I sort of went off of my lemon, brown sugar, and olive oil cupcakes, but to add fig and honey made a big difference in how the cake came together, and I had to be careful not to add too much liquid or sugar.  I think that these cakes came out beautifully and are both tasty and moist.  I had originally intended to frost them with a fig buttercream frosting, but it’s really not necessary – in fact, I think that this cake would perfect topped with just a tiny bit of whipped cream!  Sadly, I didn’t have any whipping cream in my fridge, but just imagine the photo with a dab of whipped cream and a little wedge of fig…  Pretty, right?  You can make this into 18 cupcakes or two 8” cake layers (if you make a layer cake, you could probably make more fig puree and put that inside, and frost the whole thing with whipped cream, or you could just serve wedges of cake with whipped cream).  Enjoy!

Elisa’s Fig and Honey Cakes

  • ¼ pound figs, pureed
  • ½ cup olive oil
  • 1/3 cup honey
  • 1/3 cup sugar
  • 1 tbsp lemon zest
  • 1 ½ tsp lemon extract
  • ½ tsp almond extract
  • 3 eggs
  • 2 tsp baking powder
  • 1/8 tsp salt
  • ½ cup milk
  • 2 cups cake flour (or sifted all-purpose flour)

It’s easy-peasy…  Again, throw in the olive oil, honey, sugar, fig puree, zest, extracts, and eggs, stirring them all together until they’re well-blended.  Add in the baking powder, salt, cake flour, and milk, and mix.  Pour into 18 prepared muffin cups or 2 eight-inch prepared cake pans.  Bake at 350 degrees for 20-25 minutes (for small cakes) or 40-45 minutes (for full-sized cakes).

These smell incredible when they’re baking, and taste awesome.  No frosting needed! 🙂  And since they incorporate both honey and olive oil, they’re incredibly moist and tender.

These tasty little cakes would be perfect if you cooked them in beautiful little molds... And they're so yummy!

Nutella Cupcakes with Nutella Cream Cheese Frosting

8 Sep

Nutella is a European chocolate hazelnut spread; it’s popular in Italy, slathered on toast for breakfast.  I love the stuff and will admit to having eaten it more than once directly off the spoon (I know, it’s not a health food, but sometimes a girl’s gotta have her chocolate fix!).  I’ve been wanting to use Nutella in cupcakes for a while, and this recent Fall-like weather inspired me to finally do it!  I’d seen some recipes for Nutella cake online but they all seemed very heavy – I wanted the flavor of Nutella in a nice, light cake.  So I adapted my Asti-Spumante cupcake recipe I posted last week (by adapted I mean really heavily adapted, this cake ended up having a totally different flavor and texture!).  The result?

A delicate, fluffy chocolatey cupcake that’s not cloyingly sweet.  If you haven’t figured it out by now I like my desserts on the less-sweet side, but I love lots of flavor.  The nutella shone through as the star of this cupcake, supported by a good dark chocolate base.  The texture was anything but heavy – in fact, one of my cupcakes was so delicate that the top came off as I was trying to gently remove it from my pan – and the cakes rose to pretty peaks in the oven.

If you like Nutella, or if you’re looking for a good, easy chocolate cake recipe, you’ll love this!  It comes together in one bowl, doesn’t involve sifting flour or beating egg whites, and tastes incredible.

Elisa’s Nutella Cupcakes

  • 1/4 cup softened butter
  • 3/4 cup Nutella
  • 1/2 cup sugar
  • 2 eggs
  • 2 tsp vanilla extract
  • 1/4 cup strong coffee*
  • 1 1/4 cups milk
  • 3/4 cup** cocoa powder (I only had the “normal” stuff at home; if you have Dutch process cocoa powder you may want to use less because the flavor is stronger)
  • 1/2 tsp salt
  • 1 tbsp baking powder
  • 1 1/2 cups all purpose flour

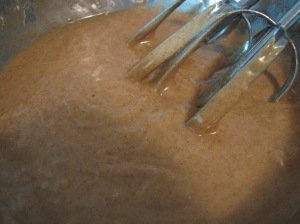
The #1 most important part of the process when making this recipe?  Scrape the sides of the bowl and the beater often!  Nutella is sticky stuff!

Beat together butter, Nutella, and sugar until light and fluffy.  Add egg and vanilla and beat until shiny and well-incorporated.  Add coffee, milk, cocoa, salt, baking powder, and flour (yes, I said add everything at once; I did it and it works like a charm here).  Mix slowly to prevent flour flying everywhere, and then beat until well-incorporated and fluffy.  Divide into 18 baking cups and bake at 375 degrees for 18-20 minutes. 

Cool and frost with Nutella Cream Cheese Frosting (recipe below).  These cupcakes are extremely delicate and on the drier side (surprisingly, given the amount of Nutella in them), so I wouldn’t recommend keeping them for more than a day or two.

Elisa’s Nutella Cream Cheese Frosting***

  • 1/2 cup softened butter
  • 1/2 cup Nutella
  • 4 oz softened cream cheese
  • 2 tsp vanilla extract
  • 2 tbsp cream
  • 2 cups powdered sugar

Using an electric mixer, beat all ingredients until light, fluffy, and fully combined.  Frosts 18 cupcakes.  This is a sweet frosting, between the sugar and the Nutella; I think it provides a nice contrast with the cake!

I tried really hard to get a good photo…  I think I need to get myself a camera that doesn’t freak out when there’s low light!

Nutella Cupcake with Nutella Cream Cheese Frosting!

*I’ve been thinking a lot about the texture of these.  I love the delicate softness.  But they’re a teeny bit on the dry side.  So I had a quick idea about how to help keep them moist – substitute coffee- or chocolate-flavored liquor (Kahlua or a Starbucks liquor or something similar) for the coffee.  Let me know if you try this!

**My husband tells me that I should rename these “Dark Chocolate Nutella Cupcakes”, and he’s right – they definitely have an intense chocolatey flavor.  If you like a sweeter chocolate flavor, I’d say you should halve the cocoa.

***So according to my friend Danielle’s comment (below), the “cupcakes are a vehicle for the frosting”.  If you feel this way too, be prepared to double the frosting recipe!  🙂

Asti Spumante Cupcakes

31 Aug

I’m baaaaaack!

Where have I been?  What have I been up to?  Well, pretty much everything.  Except blogging, that is.  I’m currently job-hunting and have been making some great strides – still nothing concrete, but I’m feeling much better about the whole process.  And I was out of town for a week visiting family.  I joined Twitter (eek!), to sharpen my social media skills, performed a duet (not to mention all the choir work) at my friend’s concert, committed to planning and coordinating another friend’s wedding, planned the marketing strategy for my other friend’s production company, and have been attempting to keep the garden going even though last week was so hot I could barely move and didn’t want to be outside during the day at all.  Our living room, at one point, was hotter with the air conditioner and fans going full-blast than the outside air was (and the outside air was mighty hot).

So I haven’t been cooking, pretty much at all, until tonight.  My garden has done some strange and wonderful things, but I’ll save them for another post.

For now, I’ll focus on my first cooking project in about a month.  Asti Spumante cupcakes!

My husband and I had opened up a bottle of Asti to drink with pizza over the weekend (what?  it’s an awesome combination – I like it more than pizza with beer!) and we had quite a bit left over, so I decided to put it to good use.

I looked online for recipes, searched through my cookbooks, and ultimately just started throwing things into my stand mixer’s bowl.  The recipe is one I’ve never seen anywhere – all the champagne cupcakes I saw online used a ton of egg whites, and I hate separating eggs and wasting yolks when I’m baking a cake.  I sort of made up the proportions as I went, so I’m actually a little surprised at how nicely the cupcakes turned out.

But nice they are!  They’re not so sweet you get a rush; you can enjoy the subtle bite of the asti spumante and the nice fruity flavor it brings to the party; the texture is soft with a beautiful dense crumb.  In short, they’re everything I wanted in a Spumante cupcake.  The added bonus is that they bake up flat – so if you were to, say, make these into a nice big cake, you’d be able to stack and frost and everything without having to mess around with cutting it.

Asti Spumante Cupcake!

Elisa’s Asti Spumante Cupcakes

  • 3/4 cup unsalted butter, softened
  • 2/3 cup sugar
  • 1/2 tsp vanilla extract*
  • 1/2 tsp almond extract
  • 1/2 tsp very fine lemon zest
  • 2 eggs
  • 1 3/4 cups all-purpose flour
  • 1/2 tsp salt
  • 2 tsp baking powder
  • 1 1/2 cups Asti Spumante

Okay, this is a basic cake method.  So you know how that goes, right?

Cream the butter and sugar together until light and fluffy.  Add the extracts and zest and mix in.  Add eggs, one at a time, beating well after each addition.  Sift together flour, baking powder, and salt in a separate bowl.  Add 1/3 of the flour mixture to the butter mixture, beat to combine, add 1/2 of the Spumante, beat to combine.  Repeat the additions, ending with the flour mixture.

For a little twist, cut back on a bit of the Spumante and add fresh berries, if you wish.  I added mashed raspberries to a third of my mixture and they were divine; sweet and tart together!

Spoon into 18 standard lined cupcake cups.  Bake at 350 degrees for 18-22 minutes.  Remove from oven when a toothpick comes out clean. 

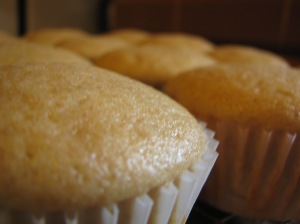
Naked Cupcake 🙂

Let cool completely and frost with a buttercream or cream cheese icing!

Enjoy!

* Originally I wrote “1 tsp” of vanilla extract, but I only actually used 1/2 tsp.  I think the recipe might benefit from having a little more vanilla flavor but I wanted to fix it to reflect what I actually did, which was quite good.

Lemon, Brown Sugar, Olive Oil Cupcakes

25 Oct

Yesterday hubby and I went up to Riverside County; he wanted to check out Tom’s Farms in Corona (we’d seen it on a recent drive up to LA – yes, we went up the 15; it was rush hour on Friday and we got there a lot sooner than if we’d have taken the 5!) and do a little wine tasting.  Plus, we’d hoped to go olive oil tasting with friends earlier this month but it didn’t work out.

We spent the whole day meandering around – first at Rancho Bernardo Winery, then up at Tom’s Farms, Bella Vista Winery in Temecula, and lastly at the Temecula Olive Oil Company.  We were really impressed with the last one – you can try all of their oils and vinegars for free!  I’d definitely reccommend stepping into the front room before your tasting, though, and picking up a (gorgeous, cheap, and super-yummy!) cibatta bread to dip into the oil.  They say it dulls the taste, but really most of us aren’t used to taking olive oil as shots.  And after a few, it gets just a little heavy on the tummy!

That said, we decided to pick up a lemon olive oil while we were there.  All evening and this morning, that olive oil was on my mind – I had to use it in a baking project!!  I ended up googling olive oil cupcakes and came up with a few recipes; ultimately I adapted this one, from a blog I hadn’t yet seen (but quickly bookmarked – YUM!).  I wanted something that would be nice and light, with a good flavor of lemon and brown sugar.  But I’ve gone off by myself too many times and come up with would-be recipes that don’t have the right proportions, so I had to start somewhere!

This recipe was supposed to make 12 cupcakes; either my cupcake pans are smaller than hers or perhaps I didn’t fill mine enough; anyway, I filled up all 12 of my cupcake cups and had plenty to spare.  But that was okay – it gave me a chance to experiment and bake a little cake!

Lemon, Brown Sugar, Olive Oil Cupcakes

  • 2 cups all-purpose flour (I used 1/2 wheat pastry flour and 1/2 unbleached white; you could probably use cake flour as well but sifting the flour made it nice and light)
  • 2 tsp baking powder
  • 1/8 tsp salt
  • 1-2 tbsp lemon zest
  • 1/3 cup sugar
  • 1/3 cup light brown sugar (you might be able to use all brown sugar, but I didn’t want it too molassess-y)
  • 1/2 cup lemon olive oil
  • 3 tbsp lemon juice
  • 3 eggs
  • 3/4 cup milk

Sift together flour, baking powder, and salt in a small bowl.  In a large bowl, combine zest, sugars, olive oil, and lemon juice.  Combine with an electric mixer.  Add eggs, one at a time, beating after each addition.  Add 1/3 of the flour mixture and 1/3 of the milk, beat well.  Add 1/2 of the remaining flour mixture and 1/2 of the remaining milk, beat well.  Add the remaining flour and milk and beat until smooth.  Pour into cupcake cups (I used 1/4 cup measure) and bake at 350 degrees for 15-20 minutes (I decided to go for 350 instead of 375 because I didn’t want them to dry out – you could probably go up to 375, as the original recipe suggests).

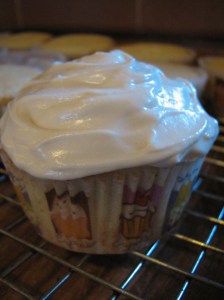
Lemon, Brown Sugar, Olive Oil Cupcakes

Lemon, Brown Sugar, Olive Oil Cupcakes

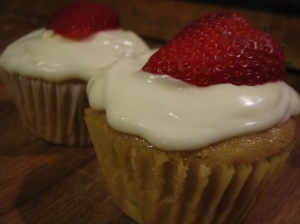
I didn’t frost these yet (they literally came out of the oven 20 minutes ago), and I might actually not frost them at all but eat them with vanilla ice cream and strawberries.  Otherwise I think they’d be really nice with a lemon or almond buttercream or whipped cream.  They have a really beautiful dainty and soft texture; they’re not very heavy, but they’re incredibly moist.  They taste lightly of lemon and brown sugar – if you want more of a lemon flavor, you could up the amount of lemon juice in them and remove some of the milk – and are not too sweet.  Just the way I like a cupcake!

We just couldn't resist trying one!

We just couldn't resist trying one!

As I said, I had some leftover batter once I poured all the cupcakes into their cups.  So I decided to be daring! 🙂  I know how much I love basil and lemon together, and I had some fresh basil we’d bought last week at Henry’s.  So I pureed a little of the basil (a good handful – sorry, I didn’t measure) and threw it into the batter before I baked up a little cake out of it!  It came out a little strange-looking, but it’s very tasty.  It’s unexpected and doesn’t really taste very “basil”-flavored, but it really adds a little kick to the recipe!

The little cake with the basil in it - yes, it's a little brown on the top... oops...

The little cake with the basil in it - yes, it's a little brown on the top... oops...

 Edited to add: I frosted these with a quick C&H buttercream variation: I used half a box of powdered sugar, 2 tbsp of butter, 2 tbsp of lemon juice, a tsp of almond extract, and some cream (I have no clue how much – it just had to be the right texture).  It was tangy and sweet but balanced, and since the cupcakes themselves were pretty mellow it just was a little wakeup call for them.  Very nice!  I still like them plain, though, too, or with berries…

Lemon Olive Oil Brown Sugar Cupcakes with Lemon Almond Buttercream

Lemon Olive Oil Brown Sugar Cupcakes with Lemon Almond Buttercream

:)

🙂

Almond Layer Cake

23 Jun

This weekend, we were celebrating not only the Great American Father’s Day, but also two anniversaries – my parents’ 32nd and my great aunt and uncle’s 63rd.  Yes, 63rd wedding anniversary.  And they’re so incredibly in love.

Anyway, they kind of snuck up on me, these celebrations.  I’ve been having this incredible roller coaster ride this month, full of parties and shows and weddings, and have really lost track of time!  So I hadn’t really planned out a gift.  To help make up for it, though, I decided I’d bake a from-scratch cake for my family’s anniversaries.  And since I’d done a lemon cake for Mother’s Day and neither my mom nor sister should have strawberries or lemons all that often, I figured I’d change it up a bit and do an almond-flavored cake.

I had planned to add ground almonds, but my sister suggested that it probably wasn’t the best for mom’s digestive issues, so I used almond extract and almond butter instead.  And I was surprised at how nicely it turned out!

First, mixing the filling – I made a buttercream (recipe straight from the C&H powdered sugar box) using almond butter in place of most of the real butter.  It was a little too wet (my fault for chilling it and spreading it right out of the fridge) but tasted great.

Almond buttercream filling

Almond buttercream filling

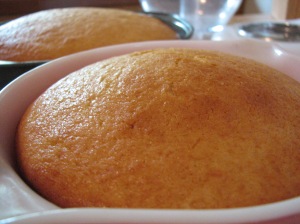
I used the standard yellow cake recipe from my battered copy of Better Homes and Gardens New Cook Book (the gold standard in cookbooks for generations on both sides of my family).  It’s not necessarily the most interesting recipe (and I saw one yesterday on Bakerella that I’m kind of curious about) but it’s kind of a no-fail one.  I added almond extract to the batter – several tablespoons – and removed a little of the milk so it wouldn’t be too runny (I love almond and vanilla together, so I left in the vanilla extract too).  I didn’t have any cake flour, so I pulsed all purpose flour in the food processor.  To tell you the truth, even though it worked, I miss using my feathery cake flour and need to get some more before the next time I bake.  I actually used one and one half recipes, so I could make a tiered cake, and greased four baking pans (two standard 8″ cake pans and two of my beloved 6″ vintage Pyrex) and lined them with parchment paper (I didn’t grease the parchment and was a little nervous, but it worked like a CHARM).  Here are two of the baked cakes.

Pretty fluffy yellow cakes

Pretty fluffy yellow cakes

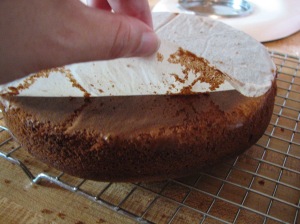
I cooled for 10 minutes in the pan, separated the sides of the cake from the sides of the pan with a butter knife, and flipped them over.  I peeled off the parchment paper, and voila! – the easiest cake release I’ve ever had.  And I’ve had some messy ones.

Peeling off the parchment paper!

Peeling off the parchment paper!

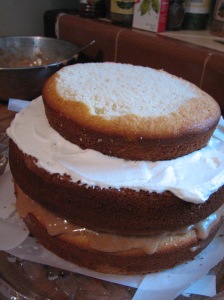
I attempted to cut the layers to even sizes.  Of course, I know how you’re supposed to do it – with spacers and measures and a large serrated knife, after they’re 100% cooled…  But I was under a time crunch and didn’t plan ahead enough.  So I settled on the large serrated knife after they were 75% cooled.  They got kind of mangled, but it’s okay.  I slathered the first layer with a leetle too much of the yummy almond buttercream (you’re only supposed to cover the inner 75% or so of the cake – and of course I went all the way to the edges before I remembered that).  As you can see, it wasn’t the prettiest cake when it was being stacked.  Also I didn’t have enough parchment paper to properly place underneath the first layer, so the whole plate ended up getting full of frosting later on…  (and no comments about the entire contents of my herb/spice/baking cupboard being out on the counter behind it…  I couldn’t find the almond extract!).

Oozy filling, uneven layers...  But who cares?  It's a yummy homemade cake!

Oozy filling, uneven layers... But who cares? It's a yummy homemade cake!

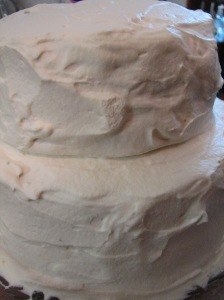
I had the hardest time with the frosting…  Should I make a standard buttercream?  Too sweet.  Smitten Kitchen’s swiss buttercream?  My mom would flip out about uncooked egg whites (plus I was feeding three people over eighty and I don’t want to be responsible for giving anyone food poisoning).  I finally decided to go with a whipped cream frosting, but I wanted it to stand up to not being in the fridge the whole time.  So I found a sort of recipe online (I can’t remember where, it wasn’t a cooking blog or site, just a forum someplace) and went with it.  I wish now that I’d used more of the gelatin, but the basic recipe was for me to scald (er, heat?) 2 tbsp cream and add it to 2 tsp unflavored, powdered gelatin dissolved in 2 tbsp of water and chill it for 20 minutes before adding it to the rest of the pint of cream, whipped with 2 tbsp powdered sugar and 1 tsp vanilla.  Later on, I saw the same recipe elsewhere, but it used the whole packet of gelatin.  I think if I do this again I’d use the whole packet, and probably chill the frosting before spreading it.  As it was, it was sort of messy, but it ended up setting up nicely once I popped the whole frosted cake in the fridge for a half hour.  I don’t like refrigerating cakes, because I think it gives them a different texture than fresh cakes, but in this case it was worth it.

Totally frosted and ready to go!

Totally frosted and ready to go!

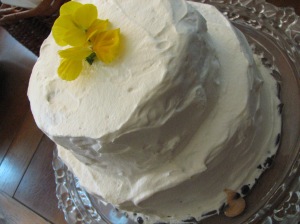
We stuck a few pansies from my mom’s garden on the top of the cake to serve.  Pansies (when grown pesticide-free, of course) are totally edible (they taste, well, flowery) and I love how pretty they looked.  You can see in this photo how much firmer the frosting looks (and this was after we’d had taken the cake out of the fridge and had it on the table for about an hour). 

Pretty!

Pretty!

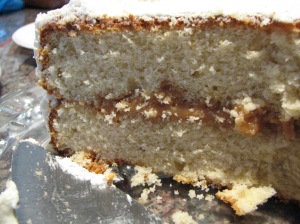
Of course, the really distracting part was that, as you can see, the cake sprung a leak.  This is why they tell you to not overfill the darn thing.  And also why I’d add more sugar next time to my filling (it was just too liquid).  Regardless, it was all tasty!

Nice soft texture with the almond buttercream filling

Nice soft texture with the almond buttercream filling